I wanted to get familiar with the IBM PC INT 1xH BIOS interrupts and explore how they’re actually used in practice, all in preparation for a challenge project. Reverse engineering the BIOS of PC-DOS seemed like the perfect exercise – the DOS BIOS handles all input and output for the DOS kernel and applications, so it naturally relies heavily on the PC BIOS INT 1xH interrupts. Plus, reverse engineering tends to give a much deeper understanding than just reading documentation online. Since I was already going to be digging into the BIOS, I figured I might as well reverse engineer the boot sector too.
So, which version of the PC-DOS BIOS and boot sector should I go with? To keep things simple, it made sense to start with the earliest version – PC-DOS 1.00. Conveniently, there was already a fully annotated disassembly of its BIOS and boot sector by Michael Steil. That said, this was primarily a learning exercise for me, so I avoided referring to his work while doing my own. As an added challenge, I wanted my disassemblies to produce binaries identical to the originals when assembled using the original assembler.
Reversing the BIOS
The first step was extracting the DOS BIOS from the diskette image. I opened the PC-DOS 1.00 disk image in a hex editor and noticed there’s no BIOS Parameter Block (BPB) seen in later FAT filesystems. I could’ve added a BPB, but I took the simpler route and extracted the BIOS directly using the hex editor. It’s the first file after the root directory. This also saved me from having to deal with system and hidden file attributes. I saved the extracted file as IBMBIO.COM and loaded it into IDA Pro.
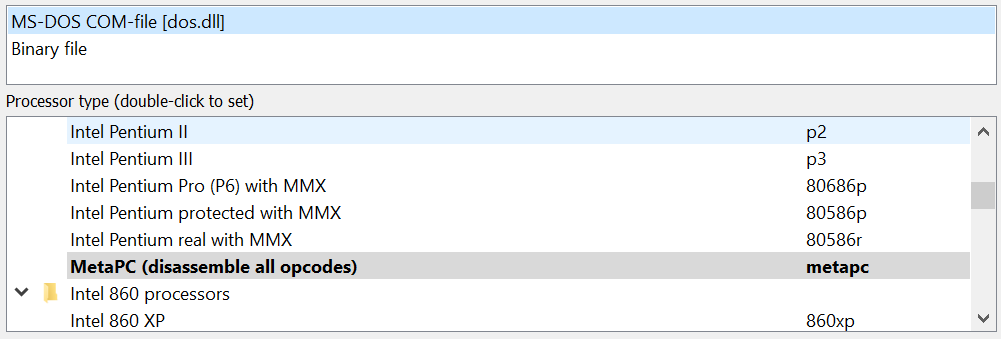
IDA identified the file as an MS-DOS .COM binary and set the processor to MetaPC, which handles all x86 opcodes. Since it’s an 8086 binary, I switched the processor to Intel 8086 to make sure the disassembly was accurate.
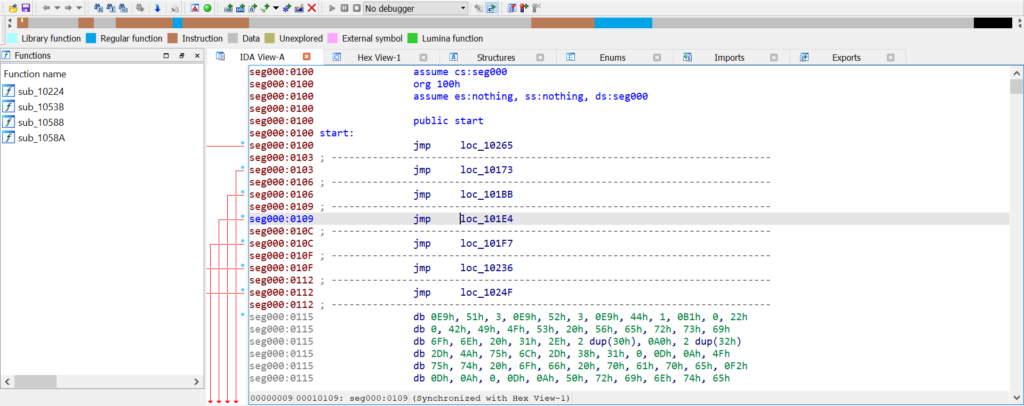
Here’s where it got interesting – IDA only recognised about 30% of the file as code, while the rest was marked as data (brown for code outside of functions, blue for functions). That seemed off. Notice the org 100h directive? That’s standard for all .COM binaries, but why?
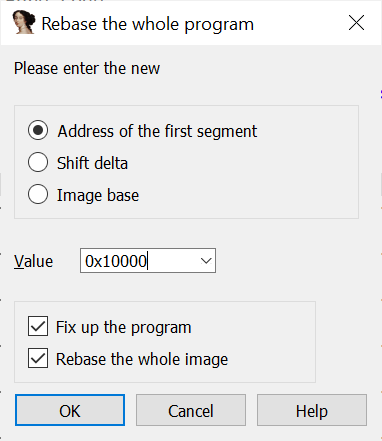
In DOS, a Program Segment Prefix (PSP) is placed at the start of each code segment, so .COM files are loaded at address 100H within their segment. However, the PSP is set up by DOS and the Command Interpreter – both of which run after the BIOS. That meant the BIOS should have been loaded at segment 60H offset 0, not 100H, as there’s no need for a PSP nor something to create its PSP. I rebased the program and re-ran the analysis.
Anything unusual? Definitely. At the start of the code, there are 10 long intra-segment jumps. Assuming execution begins at 0060:0000, the first jump would go straight to 0060:0165, leaving the other 9 jumps unused.
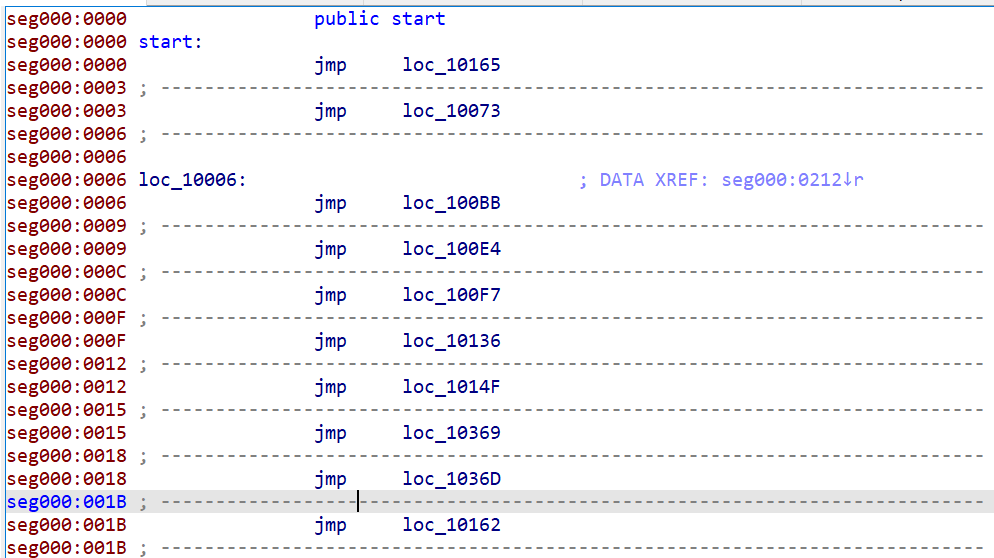
I suspected those other 9 jumps are for DOS to call via the far inter-segment CALL instruction. But what exactly do they do? Luckily, there’s a fascinating document called “Customizing MS-DOS Version 1.23 and Later” available on Bitsavers. On the very first page, I found this listing:
0000	JMP	INIT	; System initialization
0003	JMP	STATUS	; Console status check
0006	JMP	CONIN	; Console input
0009	JMP	CONOUT	; Console output
000C	JMP	PRINT	; Printer output
000F	JMP	AUXIN	; Auxiliary input
0012	JMP	AUXOUT	; Auxiliary output
0015	JMP	READ	; Disk read
0018	JMP	WRITE	; Disk write
001B	JMP	DSKCHG	; Return disk change status
001E	JMP	SETDATE	; Set current date
0021	JMP	SETTIME	; Set current time
0024	JMP	GETDATE	; Read time and date
0027	JMP	FLUSH	; Flush keyboard input buffer
002A JMP MAPDEV ; Device mappingThis document was meant for customising the BIOS of MS-DOS 1.23. Since that version was only just before IBM PC-DOS 1.10 (equivalent to MS-DOS 1.24), it was no surprise that it included more I/O functions than the PC-DOS 1.00 BIOS. Looking at the disassembly, the last function is at offset 001B, meaning all functions after DSKCHG were introduced after PC-DOS 1.00. Interestingly, a quick look at the DOSIO.ASM source from 86-DOS 1.14 showed that contrary to popular belief, IBM PC-DOS 1.00 isn’t just 86-DOS 1.14, as the three time and date functions present in 1.14’s BIOS are missing in PC-DOS 1.00.
With those functions identified using the aforementioned guide, it was time to dive into the actual reverse engineering.
The next step was the tedious but essential part – reading the disassembly. Doing so gave me valuable insights into the usage of PC BIOS interrupts, exactly what I wanted to learn. I spent two days grinding through the disassembly, reading each instruction and commenting on almost every line.
Binary-Exact Disassembly
Now for the exciting part – making the disassembly re-assemble into the original binary!
Identifying the Assembler
To recreate the original binary exactly, I first needed to figure out which assembler was used to build the original source code. The machine code produced by that assembler was remarkably clean – there weren’t any unnecessary NOPs.
Typically, when writing x86 assembly, you’ll use JMP instructions. For intra-segment jumps, there are two common types – the 2-byte short jump (JMP SHORT LABEL) and the 3-byte long jump (JMP LABEL). The 2-byte short jump has a limited range, and people don’t usually bother calculating the exact jump distance themselves while writing code. Instead, people just write JMP LABEL and let the assembler figure out whether to use a short or a long jump.
MASM, the most commonly used 8086 assembler on DOS, reserves 3 bytes for all JMPs. If the jump distance is within range for a short jump, MASM uses the first 2 bytes for a short jump and fills the third with a NOP. If the distance exceeds the short jump range, it uses all 3 bytes for a long jump. Since the PC-DOS BIOS doesn’t have any NOPs, it’s unlikely that MASM (or IBM’s version of it) was used.
What other 8086 assemblers were there in the early 1980s? Intel’s ASM86 and Seattle Computer Products’ ASM/ASM-86. DOS was originally developed by SCP and assembled using SCP’s ASM, and IBM assembled the IBM PC BIOS with Intel’s ASM86. So, which assembler did Microsoft use for the PC-DOS BIOS? The answer is SCP’s ASM, with the key clue being MSB-terminated strings.
MSB-Terminated Strings
You’ve probably heard of NUL-terminated strings used in C, $-terminated strings used by CP/M and DOS, or Pascal strings with the length embedded at the start. But there’s another lesser-known type – MSB-terminated strings.
Both character-terminated and Pascal strings come with storage overhead. Character-terminated strings need an extra character to mark the end, while Pascal strings require at least one byte to store the length.
MSB-terminated strings get rid of this overhead by taking advantage of the unused bit in ASCII characters. ASCII is a 7-bit encoding, but each character is stored in an 8-bit byte, leaving the most significant bit (MSB) unused. This spare bit can be used to indicate whether the next byte belongs to the string.
- If the MSB is 0, the byte is part of the string.
- If the MSB is 1, it marks the end of the string.
This cleverly uses the otherwise wasted bit for efficient string termination without any extra storage. The downside, of course, is that it only works with ASCII.
SCP ASM Assembler
The likely version used was SCP’s ASM 2.24, the version included with the internal pre-release of PC-DOS 1.00. However, IDA Pro generates assembly files compatible with MASM, while SCP’s ASM uses a different syntax. After reading the documentation for SCP’s ASM-86 (the CP/M-80 version of ASM), I identified several key syntax differences, outlined below.
| MASM | SCP ASM |
|---|---|
MOV CS:[Var1],AX | SEG CS MOV [Var1],AX |
| MOV BYTE PTR Var2,3 | MOV B,[Var2],3 |
| MOV WORD PTR Var3,5 | MOV W,[Var3],5 |
| MOV AX,OFFSET Var4 | MOV AX,Var4 |
| Func1 PROC FAR RET Func1 ENDP | RET L |
| RETF | RET L |
| JP LABEL1 | JPE LABEL1 |
| JMP SHORT LABEL2 | JP LABEL2 |
REP MOVSW | REP MOVW |
| DIV BX | DIV AX,BX |
| SHL AX,1 | SHL AX |
| XCHG AX,BX | XCHG BX,AX |
| DB “Hell”,”o”+80H | DM “Hello” |
| DB 10 DUP(?) | DS 10 |
ASM doesn’t support procedures or functions, so RET always performs a near return (RETN), while RET L is used for a far return (RETF). All prefixes and segment overrides must be on the line above the instruction. Memory access uses square brackets – simply referencing a label operates on the pointer itself, not the byte or word that it points to. For shifts and rotates, only the register to shift or rotate is used. For multiplication and division, the destination register must be included, which in this case is always AX.
One important difference is the JP (jump-if-parity) instruction. In Intel and MASM syntax, both JP and JPE refer to this instruction. But in SCP’s ASM syntax, JP means a short intra-segment jump (JMP SHORT), and JPE is the only name for jump-if-parity. Naming short jumps JP probably came from Z80. SCP ASM also includes a pseudo-op called DM, which defines a message (string). Strings defined with DM are MSB-terminated.
Mismatching Binaries 🙁
After getting comfortable with the SCP ASM syntax, I exported the IDA database to a MASM .ASM file and converted it to SCP ASM syntax. I tweaked the code until the error count hit zero, then used HEX2BIN to convert the Intel HEX object into raw binary. Finally, I compared the original binary with mine to see if they matched. Unfortunately, they didn’t :(.
I opened both binaries in a hex editor and compared them side by side. One of the mismatched instructions was ADD BH,2. In the original binary, the machine code is 80 C7 02 (in hex), but in my re-assembly it came out as 82 C7 02. Both opcodes perform the same operation, which made me question whether SCP’s ASM was really the assembler Microsoft had used. Assemblers typically produce deterministic output – they should generate the same machine code for the same instruction every time. So, did Microsoft actually use SCP’s ASM? Or maybe they had their own internal assembler? I scoured the web for answers, and just when I was about to give up, I stumbled upon Rich Cini‘s incredible research on the 20HAL program!
The one remaining problem relates to operand size in a single line — it compiles but produces the incorrect byte sequence. For example, code just after the loc44 label is:
mov [bx+1],ch
In the original program, this codes as 88/AF/01/00 yet when recompiled, it comes out as 88/6F/01. Even if I use the “W” (word) modifier, it doesn’t change the output. Arrrgh. One of my friends from the VCFE board mentioned a feature of the SCP assembler in which you can force a 16-bit reference by using a forward equate that’s not “near” (so -127 or +128 from the PC). So, the above would be…
mov [bx+ONE],ch
…and then at the bottom of the source file I added:
ONE: equ 1
That fixed it! Not sure if that’s how it would have actually been coded, but at least it causes ASM to emit the right bytes. There is one additional similar mis-coding in the FlushBuf routine (cmp cl,0) which requires using the same forward equate trick (cmp cl,ZERO) to get the right bytes (80/F9/00 rather than 82/F9/00).
Amazing! With this trick, I managed to make my re-assembly of the disassembled BIOS identical to the original binary! Of course, instead of generic names like ZERO and ONE, I gave them more meaningful names.
View/Download PC-DOS 1.00 BIOS Disassembly
Source Code Walkthrough
Now we have a fully working and commented copy of the IBM PC-DOS 1.00 BIOS source code! Here’s how it works:
| BIOS Function | Description |
|---|---|
INIT | This is the entry point of the BIOS, executed only once. It starts by setting up the stack – interrupts are disabled, SS is set to CS, and SP is pointed to a temporary area within the BIOS. Interrupts are then re-enabled. The reason for disabling interrupts during stack setup is a bug in the original 8086/8088 CPUs (this bug was fixed in later versions) – interrupts could corrupt memory if they fire between changing SS and SP.After that, it resets the disk system with INT 13H, configures 8N1 2400-baud serial I/O with INT 14H, initialises the printer via INT 17H, and checks the number of floppy drives using INT 11H. Once hardware initialisation is done, the divide-by-zero handler is set up and debugging interrupts are disabled.The BIOS then moves DOS to the end of its space, saving about a sector or two. The original DOS segment is calculated as RoundUp(SizeOfFile( IBMBIO.COM), SizeOfSector()) / 16 + 60H, but the new segment is simply the paragraph right after the last byte of the BIOS, saving 752 bytes in total. After moving DOS, it launches the DOS kernel and COMMAND.COM, wrapping up the boot process. |
STATUS | Returns the last character and sets or clears the ZF flag depending on whether a new character is ready. Notably, Ctrl + PtrScr is converted to Ctrl + P. |
CONIN | Waits for user input and returns the character as soon as it arrives. If the character returned by INT 16H is 0, it retries until a non-zero value comes back. Again, Ctrl + PrtScr is converted to Ctrl + P. |
CONOUT | Outputs a character to the console using INT 10H. The page number is set to 0, and the text colour is set to light grey. |
PRINT | Sends a character to printer 0 using INT 17H. If an error occurs (except for out-of-paper, which fails immediately), it retries the operation. If it fails again, an error message is displayed on the console. |
AUXIN | Receives and returns a character via INT 14H. If overrun, parity, or framing errors are detected, an error message is displayed. Only port 0 is used. |
AUXOUT | Outputs a character to the auxiliary output device on port 0. An error message is displayed if the error bit is set. |
READ/WRITE | These functions are nearly identical, differing only in the operation parameter passed to INT 13H. They convert the data pointer to a linear address and check whether 64 KiB boundaries are crossed. If the data area doesn’t cross the boundary, the transfer happens in one fell swoop. If it does, the sectors up to the boundary are transferred first, followed by the sector at the boundary using a temporary area, and then the remaining sectors. Each read/write operation can be retried up to 5 times, and the BIOS translates disk error codes into DOS error codes, setting the CF flag on fatal errors (i.e., if all 5 attempts fail). |
DSKCHG | A stub that just returns 0. It does not appear that the IBM PC can detect disk changes. |
String Termination – Revisited
It’s worth noting that the internal string-printing function used for displaying error messages clears the MSB of each character before sending it to the console, since the strings are MSB-terminated. Interestingly, all error messages were also NUL-terminated on top of having their MSBs set for the last character. This is proof that Microsoft used the DM (Define Message) pseudo-op instead of DB (Define Byte), even though they still wanted NUL-termination in their strings.
HELLO:	DB	"Hello, World!",0	;NUL-terminated string "Hello, World!"

HELLO:	DM	"Hello, World!"		;MSB-terminated string "Hello, World!"

HELLO:	DM	"Hello, World!"		;MSB- and NUL-terminated string "Hello, World!"
DB 0 ;All strings are defined this way in the BIOS!My guess is the Microsoft developers who wrote the BIOS didn’t realise they could define regular strings using the DB pseudo-op, so they went with DM for everything involving strings.
Segment Override Prefix
Another interesting find is a strange segment override prefix lurking in the binary. Take a look at the console output function:
;
; CONOUT - Console output
;
; AL contains the character to output to the console, all registers
; must be preserved.
;
CONOUT:
	PUSH	BP		;Save all necessary registers
	PUSH	AX
	PUSH	BX
	PUSH	SI
	PUSH	DI
	MOV	AH,0EH		;Function = write char
	SEG	CS
	MOV	BX,7		;Light gray and page number = 0
	INT	10H		;Call video BIOS service
	POP	DI		;Restore all saved registers
	POP	SI
	POP	BX
	POP	AX
	POP	BP
RET LSee anything unusual? Look at the SEG CS line right above MOV BX,7. That effectively turns the instruction into MOV CS:BX,7, which isn’t really a valid 8086 instruction. SCP’s assembler didn’t care though – it treated the segment override prefix as a separate instruction.
But why was there a segment override when you’re just moving a constant into a register? There must’ve been at least one line of code between SEG CS and MOV BX,7 which got removed, then whoever removed it forgot about the segment override on the line before. I’ve actually made this exact mistake myself, twice, when modifying boot sector code for an upcoming project (which I’ll write about in a future post).
So, what was actually removed? Technically… nothing! The line after SEG CS was changed from MOV BX,[TXTCOLOR] to MOV BX,7. The TXTCOLOR variable had a constant value of 7, they’ve simply replaced the constant variable with an immediate. How did I figure this out? Well, I didn’t, I took a peek at the BIOS from the PC-DOS 1.00 pre-release from early June.
Unbuggy Bug
Now, onto the most interesting… bug! When the BIOS couldn’t find a valid copy of COMMAND.COM, it’s supposed to display the error message Bad or missing Command Interpreter and then stall the machine in an infinite loop. This BIOS does exactly that, but in a rather peculiar way.

Here’s the code responsible for printing the error message and putting the CPU into an infinite loop:
COMERR:
	MOV	DX,BADCOM	;Load bad or missing message
	CALL	OUTPSTR		;Print it out

STALL:
JPE STALL ;Do nothing foreverHow does JPE (jump-parity-even) stall the machine when it’s a conditional jump? Shouldn’t an unconditional jump be used, to guarantee the infinite loop? Actually, in this specific case, JPE does the job.
The PF (parity flag) is set or cleared based on the result of the last operation – it’s set to 1 if the result has an even number of 1s, 0 otherwise. Let’s look at the instructions that run just before the JPE:
;
; Output string to console
;
OUTPSTR:
	XCHG	DX,SI		;Swap DX and SI (for LODB)

OUTPSLOOP:	;Character output loop
	SEG	CS
	LODB			;Load byte at SI to AL

	AND	AL,7FH		;Clear MSB, we used to set MSB for last
				;char to terminate strings to save
				;space, now we have moved to zero-
				;terminated strings but we still need to
				;handle MSB-terminated strings because
				;ASM still sets MSB for strings

	JZ	OUTPSDONE	;Reached end of string, break out of
				;loop
	CALL	CONOUT,BIOSSEG	;Call BIOS CONOUT function
	JP	OUTPSLOOP	;Back to loop beginning

OUTPSDONE:
	XCHG	DX,SI		;Swap DX and SI back
RETThe instruction right before the JPE is the RET from OUTPSTR. RET doesn’t affect any flags. Before RET is an XCHG, which also doesn’t touch the flags. And how does one reach that XCHG? The only path is through the JZ OUTPSDONE instruction.
What’s the condition for JZ? The result of the previous operation being zero. How many ones are there in zero? None. Is zero even? Yes. So the PF is guaranteed to be set. Since neither XCHG nor RET changes the flags, when JPE is executed, the PF would still be set. This guarantees that when the JPE is executed, it always performs the jump, hence stalls the machine as required.
So we’re back to the question why didn’t Microsoft use an unconditional jump here? I’m taking a wild guess here, but most likely they did in the original source code. However, they then modified SCP’s assembler, changing JP (short jump) to match Intel’s definition of “jump-if-parity”, and likely came up with a new name for short unconditional jump (maybe JMPS, supported by later versions of ASM). The code for loading COMMAND.COM was copied almost verbatim from 86-DOS’ DOSIO.ASM (you can compare them yourself). Perhaps they overlooked replacing JP with their new name. As a result, JP in the source code got assembled into JPE, and they never noticed it because it always worked. Again, this is just a wild guess.
Stealing Borrowing More Code
Here’s another example of Microsoft copying SCP’s code. Check out this snippet:
;Load 86-DOS
	MOV	SI,INITTAB	;Load drive list pointer
	CALL	0,DOSSEG	;Call DOS init
	STI			;Enable interrupts
...
...
;Make all segment registers the same
	MOV	DS,BX
	MOV	ES,BX
	MOV	SS,BX
MOV SP,40H ;Set stack to 64 bytesWhy didn’t they disable interrupts when changing the stack segment? Simple – they copied this straight from SCP. DOS disables interrupts during initialisation and doesn’t re-enable them. Since SCP didn’t do an STI after DOS initialisation, it was safe for them to change SS:SP without worrying about memory corruption from interrupts firing midway. Microsoft, however, re-enables interrupts right after DOS initialisation. This makes changing SS:SP with interrupts enabled a risky move. That said, this wasn’t a major issue at all given that all IBM PCs shipped with processors that had the memory corruption issue fixed.
Microsoft also didn’t just copy the COMMAND.COM loading code from SCP’s DOSIO.ASM – they also made two notable changes:
- Reduced the stack size by changing the initial stack pointer from
5CHto40H. - Changed the Disk Transfer Address (DTA) from a constant value (
80H) to the value stored at offset80Hin theCOMMAND.COMsegment ([80H]).
	MOV	DX,[80H]	;Transfer address
	MOV	AH,1AH		;Function = set disk transfer address
INT 21H ;Call DOS interruptReducing the stack size is somewhat understandable, though it increases the risk of stack overflow (and doesn’t actually save any RAM here). But changing the DTA from 80H to [80H] is a real issue – it introduces undefined behaviour which could cause bugs and memory corruption. Clearly, whoever made this change didn’t know what they were doing. Both changes got reverted by the next release (PC-DOS 1.10).
Reversing the Boot Sector
Now, the boot sector. Having written a boot sector game before, I was already familiar with how boot sectors work and that the base address is always 7C00H. I saved the boot sector as a .BIN file, loaded it into IDA Pro and set the base address to 7C00H. Compared to the BIOS, the boot sector was much simpler to reverse since it only does the bare minimum needed to boot DOS.
View/Download PC-DOS 1.00 Boot Sector Disassembly
Walkthrough
Here’s a breakdown of what the boot sector does:
- Set up the stack at
0000:7C00, just below the boot sector in memory. - Reset the disk system.
- Check for the presence of system files.
- Read the first sector of the root directory into memory at
0060:0000(where the BIOS gets loaded later). - Convert the first two filenames to lowercase and compare them against the hardcoded filenames.
- Read the first sector of the root directory into memory at
- If the disk is a valid system disk…
- Read 20 sectors starting from the first data sector into memory at
0060:0000. - If disk read succeeds…
- Jump to
0060:0000.
- Jump to
- Otherwise…
- Print an error message and boot to ROM BASIC using
INT 18H.
- Print an error message and boot to ROM BASIC using
- Read 20 sectors starting from the first data sector into memory at
- Otherwise…
- Prompt the user to insert another disk and try again.
String Termination – Revisited Again
Just like in the BIOS, the error messages in the boot sector are MSB-terminated, suggesting Microsoft used DM for string definitions. But the most interesting part is how the system filenames are terminated – they’re also… zero-terminated, as in they ended with the ASCII character '0' (with the MSB set).
This is again strong evidence that Microsoft didn’t know strings could also be defined with DB, and were forced to use DM. Using DM creates inefficiencies when comparing strings. For instance, you’d need to:
- Strip the MSB of the last character before using
REPE CMPSB, or - Compare the first 10 characters and handle the last one separately.
Instead, Microsoft’s workaround was to append an extra character ('0') to the end of the strings, so the MSB would be set on this extra character instead of the actual last character, making comparisons straightforward.
Lowercase Filenames
Another intriguing oddity in the boot sector is that filenames are converted to lowercase before being compared to the hardcoded lowercase filenames. Given that filenames in the root directory could only be uppercase, why would they waste time and space on something seemingly pointless?
Here’s the reason – initially, system files lived in the reserved system area, similar to CP/M. But as DOS grew, the reserved area was no longer big enough to hold the entire system. To fix this, the system files were moved from the reserved area into standard disk files. The downside was that users could now easily modify or delete these files, making the disk unbootable. To protect them, the system files were then given lowercase filenames in the root directory, since DOS only recognised uppercase filenames. This hack effectively prevented DOS from touching the system files, and as a result, boot sectors from that time compared filenames against lowercase ones.
So, why are the files IBMBIO.COM and IBMDOS.COM uppercase in PC-DOS 1.00? Good question. In mid-1981, file attributes were introduced to mark files as system and hidden. This prevented users from tampering with the system files while keeping filesystem abuse to a minimum. Once this was in place, the filenames were reverted to uppercase. According to a document from the PC-DOS 1.00 pre-release disk, this change happened shortly before 1981/06/05:
2. The system files have reverted to upper case letters again, but will not be included in any directory searches because of a new byte (attribute) in the directory entry (they won’t show on a DIR command, and can’t be erased, copied, folded, spindled or mutilated). The FORMAT ans SYS commands both can be used to put these files on a diskette (if SYS is used, the disk must have already had the system on it). In addition, FORMAT writes the boot record and copies COMMAND.COM.
PC-DOS 1.00’s boot sector dates back to 1981/05/07, so it makes perfect sense that it used lowercase filenames.
Conclusion
Reversing these binaries was an absolute blast! Along the way, I learned a ton about the 8086 architecture, the IBM PC, and DOS itself. I spent about 10 hours researching the quirks, inconsistencies, and bugs in the code, dove into over 250 pages of documentation (from 86-DOS 0.3 Programmer’s Manual, Customizing MS-DOS 1.23 and Later, IBM 5150 Technical Reference, PC-DOS 1.0 Manual, and the Z80/8086 Cross Assembler Manual), examined five different DOS versions (86-DOS 1.00, 86-DOS 1.14, PC-DOS 1.00 pre-release, PC-DOS 1.00, and PC-DOS 1.10), and spent over six hours on the actual reverse engineering.
To put all the stuff I’ve learned into use, I went and fully ported 86-DOS 1.14 to the IBM PC, making sure all features, including INIT, RDCPM and SYS worked as expected. It was quite the journey, and I had a fantastic time diving into the inner workings of these systems. I’ll be talking about that in the next post.
See you later!